 |
| Picture courtesy of Dylan |
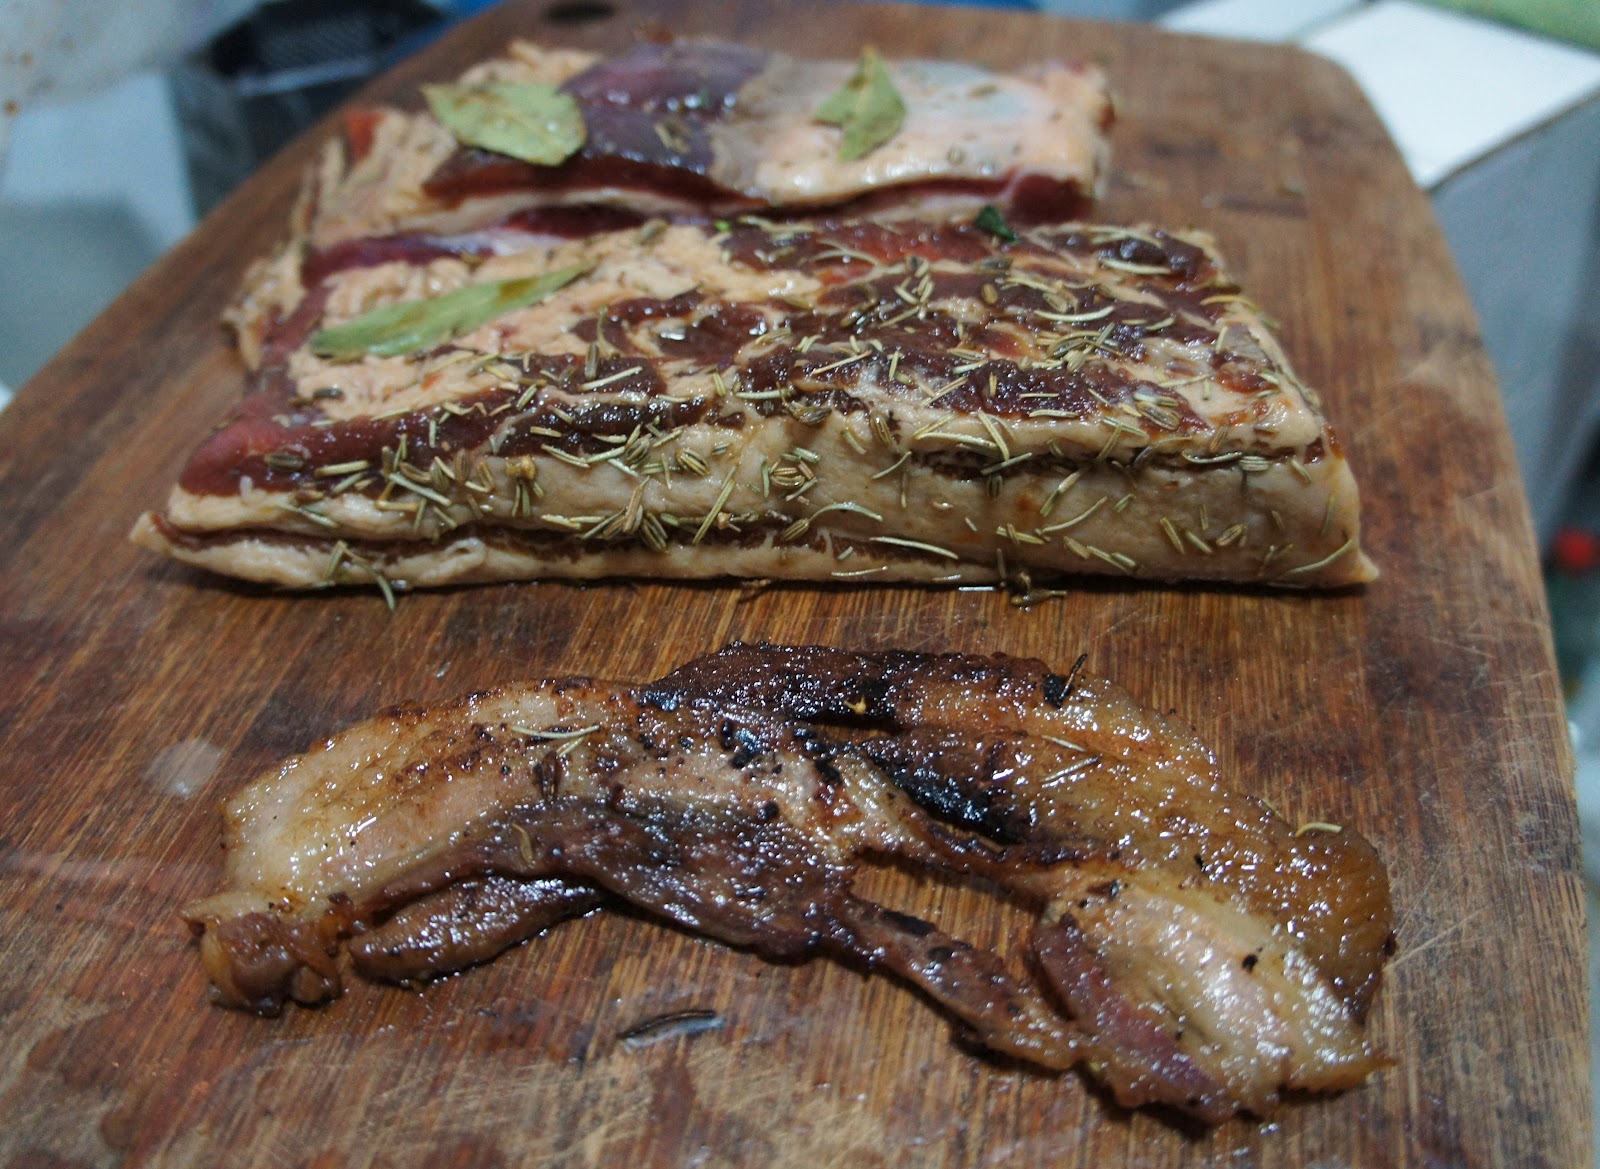
When I told my dad that I make my own bacon, his first reaction was 'be careful not to poison yourself!!'. Um, yes. That is a concern, I suppose. This bacon, though, is what's known as 'green' bacon, meaning it is unsmoked. Because it's not smoked, it has a shorter shelf life. Fortunately, it's so delicious it barely lasts 2 days once it's done curing.
This bacon is fantastic for breakfast or cut into small pieces and sauteed with spinach. My favorite way to eat it, though, is on a BLT. Because it's not pumped with salt water like the store bought kind, this bacon won't shrivel up and shrink when fried. It stays in its glorious meaty, thick sliced state which makes for really excellent sandwiches when topped with tomatoes, and lettuce, a little mayo and some fresh cracked pepper.
This bacon is fantastic for breakfast or cut into small pieces and sauteed with spinach. My favorite way to eat it, though, is on a BLT. Because it's not pumped with salt water like the store bought kind, this bacon won't shrivel up and shrink when fried. It stays in its glorious meaty, thick sliced state which makes for really excellent sandwiches when topped with tomatoes, and lettuce, a little mayo and some fresh cracked pepper.
Please do not be intimidated by this. The hardest part of this process is probably finding the right cut of meat. However, if you have a friendly disposition and don't live in a tree stump in the middle of the woods, it's almost guaranteed you can get your hands on some easily. Heck, even if you do live in a stump and are mean as all get out, if you can find a pig, you can make bacon.
What is curing? Well, in nontechnical terms, it's the process of preserving foods using either salt or sugar. I generally think of dry curing, which involves just dry ingredients. But there is also brining, which involves liquid and it can cure as well.
Is curing bacon hard? No. More primitive peoples cured meat, so if you can use your iPod, you can make bacon.
Don't I need special materials and equipment? No. Seriously. A gallon sized zip lock, a knife and your hands work fine. Oh, and a bowl and a plate. If you eat, it can be made. Some people use nitrates to ensure that they don't get botulism. As long as you use a clean cutting board, clean hands and clean tools, this bacon will be fine. And as long as you eat it within a week or so, you will be fine.
Doesn't it take a lot of work? No. Literally 6 minutes at the beginning, 2 seconds every day for around 5 days, and then the time it takes to slice, cook and eat every last morsel once it's done.
Here are the steps.
How to Make Bacon
adapted from Saveur Magazine's recipe, here
adapted from Saveur Magazine's recipe, here
Ingredients:
2 1/2 lb pork belly, skin on.
1 1/2 tbsp dark brown sugar
1 1/2 tbsp salt (I use regular table salt. If using kosher, go up to 2 tbsp)
1 tbsp crushed dried rosemary leaves
1/2 tsp ground sage
1 tbsp fennel seeds, whole
3 bay leaves
a pinch of red pepper flakes
fresh ground pepper
1) Get your hands on 2 1/2 pounds of pork belly, skin on or skin off. Skin on ensures that you'll be the judge of how much fat you keep on there, and it is generally sold this way. Skin off, however, will do.
 2) Trim you pork belly into a rectangular piece. Cut off the skin (or rind as it's sometimes called), leaving at least a 1/4 inch of fat.
3) Mix together your dry rub, minus bay leaves.
4) Place the pork in a gallon zip lock bag. Pour in all of the dry mix, and shake it all around to coat. Use your hands to pat it on there through the bag. Get as much air out of the bag as possible to ensure good surface contact with bacon and dry rub, and zip closed.
5) Put it in your refrigerator, on the bottom shelf, on a plate. Every day for 4-5 days, turn it over to ensure even curing. While you're doing that, poke it to see how firm it is. On the 4th day, take it out, cut a small piece out of the middle and fry it up to try. If you like it, cut it up and eat it! If it's not as firm or salty/sweet as you want, put it back in to cure a day or two more. If it's too salty, put it in a bowl of cool water for an hour or so to dry out some salt, then pat dry with paper towel and eat!
6) Once you have it at the flavor and texture you want, rinse off excess spices, and pat dry with a paper towel. Put it on a clean plate, and put it in the refrigerator for a few hours to 1 day with just a paper towel or plastic wrap loosely covering it. You want to dry it up a bit. After that, pre-slice or leave whole and store in a new, fresh ziplock in the fridge for up to 2 weeks or in the freezer for 3 months.
7) There is also the option of putting it in a very low oven at about 200F~85C wrapped in aluminum foil for an hour or two to firm it up and render some of the extra bacon fat. This is optional, however, as it will only affect the slice-ability of your bacon, and not the tastiness.
Your bacon will last approximately 1- 2 weeks in the refrigerator. Be smart. Your bacon should have almost no scent at all. If it begins to have an odd smell, toss it. If it has a faintly green color, toss it. Neither of these things have ever happened to me, but use your head. Don't be gross and don't risk your stomach!